How To Run Cable Through The Wall?
In today’s world, where most aspects of our lives are dominated by technology, a reliable and fast internet connection is a necessity rather than a luxury. While wireless communication has come a long way, there are still situations where a wired internet connection is essential. It is all more crucial for activities that demand low latency, such as gaming.
However, running Ethernet cable through walls may seem a bit daunting! But fear not…Today, I will provide you with step-by-step instructions on how to do it in the easiest way possible. I can assure you that it will help to create a Wi-Fi mesh network throughout your home without breaking the bank.
So whether you’re a hardcore gamer or simply looking to improve your internet connection, this is the one-stop solution for you. Keep scrolling…
Adding Wired Connectivity to Your Home: A Guide to Wiring Ethernet Cables Through Walls
If you’re planning to add wired connectivity to your home, you might have a few queries. One of the most common ones is how difficult it is to run ethernet cables through walls. The answer depends on the type of walls you have! But generally speaking, it’s not that difficult.
Step 1: Planning Which Rooms/Walls Will Have Ethernet Cable
The first step in wiring ethernet cables is to decide which rooms will need them. If your home already has ethernet wiring, you might want to expand it to other corners of the house. In case you don’t have any ethernet wiring, you’ll start from scratch.
Once you’ve decided which rooms will require an ethernet cable, you must plan the number of outlets for each room. This will help you determine how much cable you’ll need and where it will need to go.
Step 2: Set the Path
After you’ve planned which rooms will have an ethernet cable, you’ll need to create a path for it. Start at the distribution point, usually the room where your modem, router, or switch is located. From there, plan a path in each outlet for every room you’re aiming for!
When choosing a path, try to keep it as short as possible. If the cable is too long, you might have to bear the risk for signal loss and interference.
Step 3: Choose the Right Cable
Choosing the right type of ethernet cable is crucial. It will ensure you the best performance. For starters, a plethora of ethernet cables are available in the market. The most popular ones are CAT5/5E, CAT6/6A, CAT7, and CAT8.
However, for most home networks, I recommend using CAT6 or CAT6E. These cables support up to 10Gbps transfer speeds. Moreover, it will help you run up to 100m without signal loss.
On the flip side, if you want a future-proof solution, CAT7 or CAT8 cables are the best bet. These cables support even faster transfer speeds and have better shielding against interference.
Lastly, it’s also crucial to choose the right cable length and thickness. Thicker cables are generally better at reducing signal loss but can be more difficult to install.
Step 4: Tools You’ll Need
Start gathering the following tools and accessories that you’ll need for the job:
Tools for Wiring
- Cordless drill
- Stud finder
- Reciprocating saw
- Fish tape
- Wire stripper
- Zip ties
- Velcro straps
- Label maker
Tools for Ethernet
- Ethernet wall socket
- Punch down tool
- Ethernet switch
- RJ45 crimper
- RJ45 plugs
Step 5: Plan Your Wiring Route
Before you begin, create a rough plan of the path the ethernet cables will follow. Consider the locations of rooms with TVs, computers, or gaming consoles that need ethernet connections.
You may need to run cables through the garage or other parts of your home to add a Wi-Fi extender or repeater.
Step 6: Setting Up the Distribution Point
The distribution point is where all your ethernet cables will terminate. Also, this is where you’ll keep your main modem or router.
So, here’s how you can set it up:
- Turn off the power. You probably know that running ethernet cables through walls doesn’t involve electrical wires. However, you’ll still be drilling holes in the wall where electrical wires and ducts run.
- Use a stud finder to locate two studs. The network panel goes in between these studs. Make a small square hole in the center to see behind the wall.
- If there are no obstacles, you can proceed to cut the drywall to fit a wiring panel. Use a network switch to terminate all the ethernet cables. Your router/modem will drive the network switch.
Step 7: Cut/Drill Holes to Run Ethernet Cables
The next step is to make the necessary holes in the walls, floor, or ceiling to run the ethernet cables. Start with drilling a hole above the distribution/network panel. Then, drill holes near the devices requiring an ethernet connection.
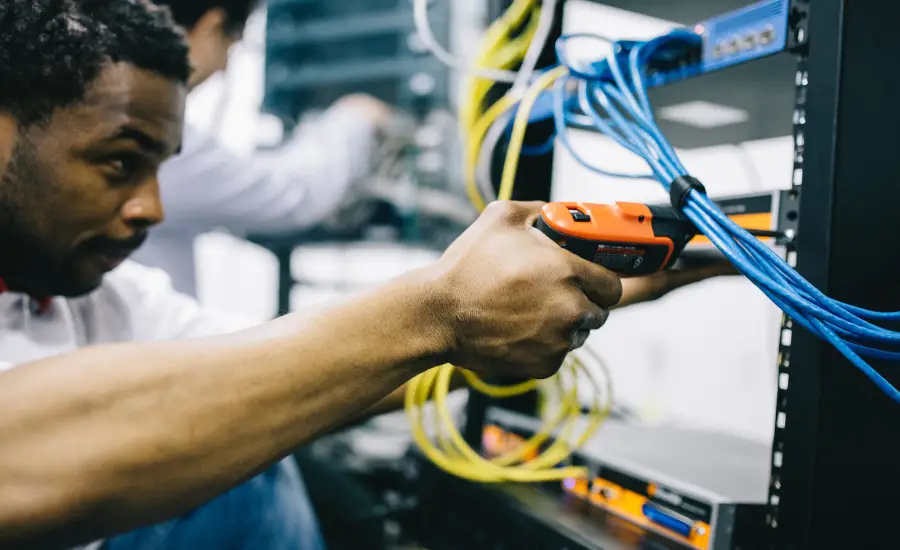
Step 8: Feed the Wires Through Holes & Walls
Once you drilled the holes, it’s time to start feeding the cables through them. This is a vital step in the installation process. It makes sure that each room is connected to the right cable. It avoids any confusion later on. To make things easier, it’s a good idea to label the cables as you feed them through the holes.
Using names such as “bedroom,” “office,” “TV,” and “PC” can help you keep track of the each cable. This will also come in handy if you need to troubleshoot or make changes to your setup.
Labeling the cables will save you time and effort in the long run. It will ensure that your home network is organized and easy to manage.
Step 9: Terminate the Cables
Once you’ve run all the cables through the walls and holes, crimp the cables using a punch-down tool at the ethernet wall sockets. You may use velcro straps or cable ties to secure the cables.
In Conclusion
By now, I guess you know wired ethernet provide numerous benefits over wireless connections. You get faster speeds, reduced latency, and increased reliability. Unfortunately, many homeowners face the challenge of running ethernet cables through walls to establish this connection.
But this shouldn’t be the challenge anymore. Feel free to follow what I’ve discussed above to setup your cables in no time!